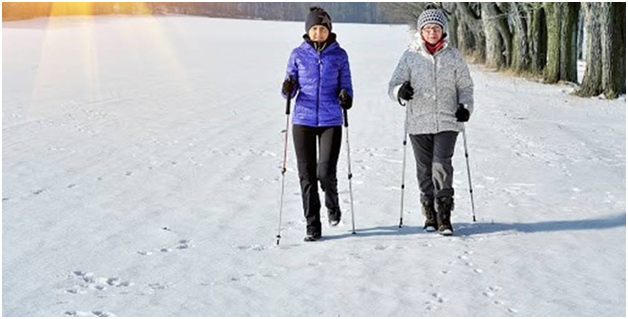
See for yourself, why this is an activity that is rapidly gaining popularity among people of all ages and fitness levels around the world.
As is the case with any exercise or activity you choose to participate in, you are sure to gain the most benefits and enjoyment from your experience with Nordic Walking, if you start off with the proper technique.
The third and final part of the Urban Poling Blog posts will cover the basics of using both the Activator and the Urban Poles, and include a brief review of the circumstances that would deem their use appropriate.
- Pre- and post-surgical hip and knee issues
- non-acute soft tissue injuries
- osteoporosis
- mild stroke
- acquired brain injury
- post-surgical spinal stenosis
- cardiac issues
- arthritis if not severe rheumatoid arthritis that is affecting hand strength
- early stages of Parkinson’s and multiple sclerosis
- respiratory conditions that are stable, and
- non-acute and breast cancer after acute phase of surgery and treatment
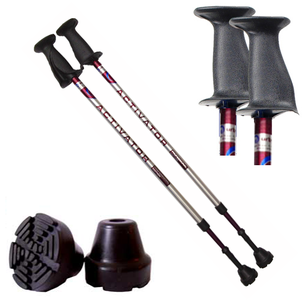
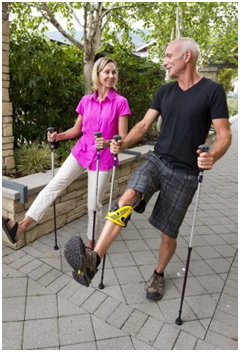
- Place your hands on right and left poles as indicated on top of the Core Grip
- Be sure to wrap your fingers around the handles without squeezing them too tightly.
- Try and stand with an upright posture, with your poles planted so that they are vertical, and always placed in front of your feet.
- Relax your elbows but have them bent to slightly below 90 degrees. You may need to adjust the height of your poles to get this comfortable and in the right spot!
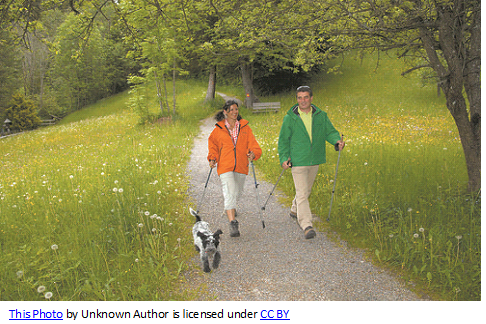
- As you begin walking, step forward with your LEFT leg and swing your RIGHT arm forward, planting the bell-shaped tip of the RIGHT pole directly across from the front of your LEFT foot.
- Follow it up with the other side! Right leg with Left arm!
- This will become easier with practice - keep going! It will feel like a regular walking pattern where you swing your arms forward and backward.
- Do YOU want to ACTIVATE your CORE?
- Press firmly on the ledge of the handle with the outside border of your hand to activate your arm and core muscles each time you plant the pole. Remember, this action will off load weight from your lower body joints and spine and assist with stability.
- Early stages of neurological conditions
- Younger clients and active clients
- Short rehab period – injuries
- Obesity, cardiac rehabilitation, and diabetes
- Weight management and core strengthening, as well as
- Your own general health, and employee wellness
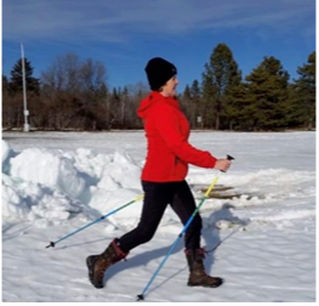
- Holding the appropriate LEFT and RIGHT poles with a light grip, stand with your arms straight and your thumbs beside your thighs so that the tips of your poles are on the ground behind you. **NOTE this is a different starting position!
- To achieve the correct length of your poles there will be markings that correspond to your height that you will adjust and lock your setting to, although when starting out it is recommended that you set them slightly below until you are comfortable with the technique.
- Keep your eyes up and begin walking while dragging your poles behind you, moving your opposite arm and leg together as you would with regular walking.
- Keep your rib cage lifted and your shoulders relaxed as you continue walking, gradually making your steps longer and your arm swings higher until they are a little higher than a high handshake position.
- Your arms should be swinging from the shoulders like long pendulums, with your thumbs returning beside your thighs with each swing.
- Maintain a relaxed grip and press on the base of the handle each time the tip of the pole lands and grips the surface, pushing the ground back behind you.
- Then, once you “get the swing of things” so to speak, instead of dragging your pole tips, begin to lift them slightly (approximately 1 cm) off the ground and firmly plant them with each stride.
- This is similar to Activator Poles in that you are using opposite arm with opposite leg!
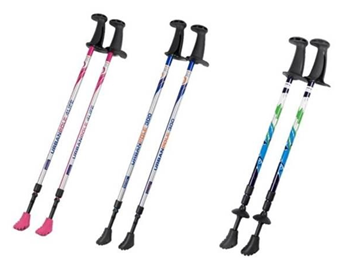
the pole tips are interchangeable and can be matched to varying surfaces.
This is exciting, because it increases your options for where you can walk with the poles!
Traction is key when using the poles, so when you firmly plant the pole, you don't want to slip.
Pole Tip Options:
- Bell tip: for general use with activator poles indoor and outdoor on level surfaces for increased stability.
- Carbide tip: If terrain is challenging or if carrying a back-pack to help with pole traction and stability (keeping elbows bent and poles more upright is also helpful in this situation).
- Boot tip: rubber type traction for use indoors and outdoors on concrete sidewalks and asphalt surfaces (attached facing backward at the end of your poles).
- Trekking baskets: used as an attachment with carbide tips for use in muddy or rocky terrain.
- Snow baskets: used as an attachment with carbide tips to help keep poles from sinking into deep snow (great for use with snowshoeing).
It is good to REMEMBER, Although it is recommended that your activator and urban poles NOT be used intentionally on icy surfaces, keeping a set by the door in snowy climates where slippery conditions are quite common makes good sense as one way of being proactive in fall prevention.
Also - Don't Forget
Talk with your physician or therapist before using the poles if:
- you currently use a cane or walker,
- have any medical condition which affects your balance, stability, grip strength, vision, depth perception, judgment or co-ordination or
- if you are currently recovering from an injury or surgery.
- as a means of becoming more active through a safe and fun activity that will improve your level of confidence and quality of life,
- or simply to step up your fitness game for added strength, posture, and conditioning benefits, let us know.
We would be happy to consult with you, as well as others on your health care professional team, to confirm if Nordic walking might be appropriate for you, or for someone you know.
Click below for more details!
- The Urban Poling Ultimate Guide to Nordic Walking; Barb Gormley; Volume one updated and revised; Custom Press 2019
- Urban Poling – Activator course for rehab professionals



 RSS Feed